First-Time Setup
After installing SignalRGB, follow these steps to get everything configured properly.
Before You Start
Section titled “Before You Start”Make sure you have:
- SignalRGB downloaded and installed
- A Windows 10 or Windows 11 computer
- At least one RGB device connected (keyboard, mouse, fans, strips, etc.)
Uninstall Conflicting Software
Section titled “Uninstall Conflicting Software”Other RGB programs (like iCUE, Synapse, or Aura) can prevent SignalRGB from controlling your devices. Remove them before continuing. See Conflicting Programs for a full list.
To remove an application:
- Click the Windows icon in your taskbar and type Control Panel
- Click Uninstall a program under Programs
- Select the application you want to remove
- Click Uninstall in the toolbar and follow the prompts
- Restart your computer after removing all conflicting software
If SignalRGB detects conflicting software still running when you launch, a popup lists the active programs and lets you close them. You can also close them manually through Task Manager.
Create or Sign In to Your Account
Section titled “Create or Sign In to Your Account”Signing in gives you access to the full effect library, cloud sync, and Pro features. You can skip this step and explore the app without an account — sign in whenever you’re ready.
See How to Create an Account for a step-by-step walkthrough.
Complete the Onboarding Walkthrough
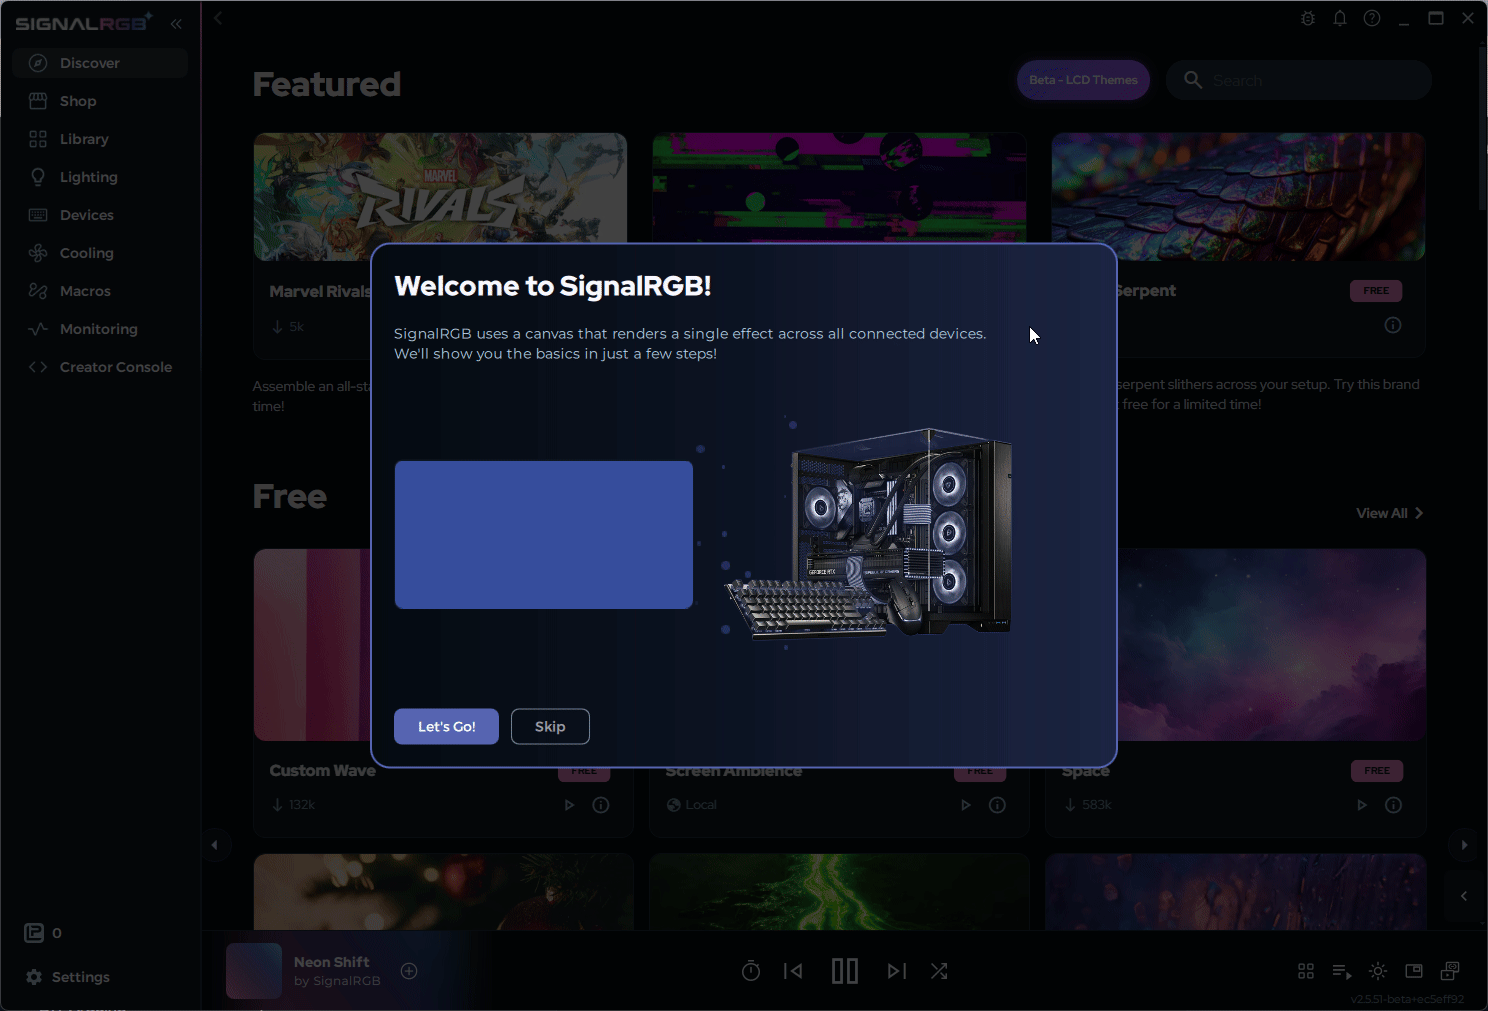
Section titled “Complete the Onboarding Walkthrough”Welcome to SignalRGB
Section titled “Welcome to SignalRGB”SignalRGB uses a canvas that renders a single effect across all connected devices. We’ll show you the basics in just a few steps!
Check Your Devices Are Pulsing
Section titled “Check Your Devices Are Pulsing”SignalRGB pulses all your devices a single color to confirm they’re detected and responding.
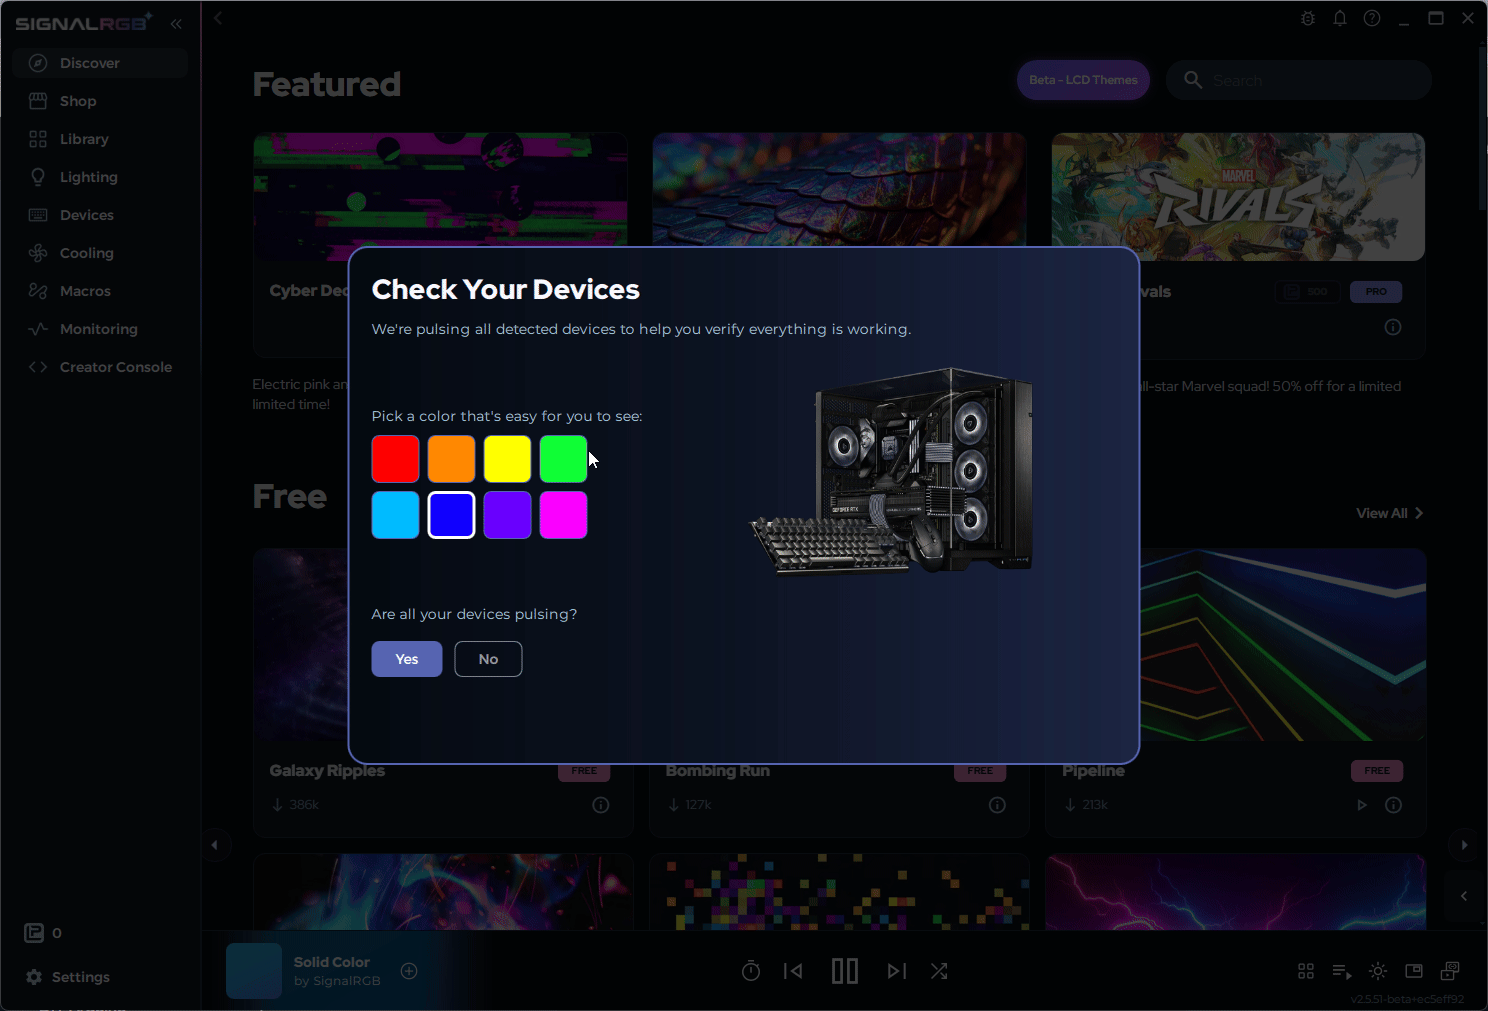
If your devices are pulsing correctly, continue to the next step.
If your devices are not pulsing correctly, click No on the prompt and follow the on-screen steps.
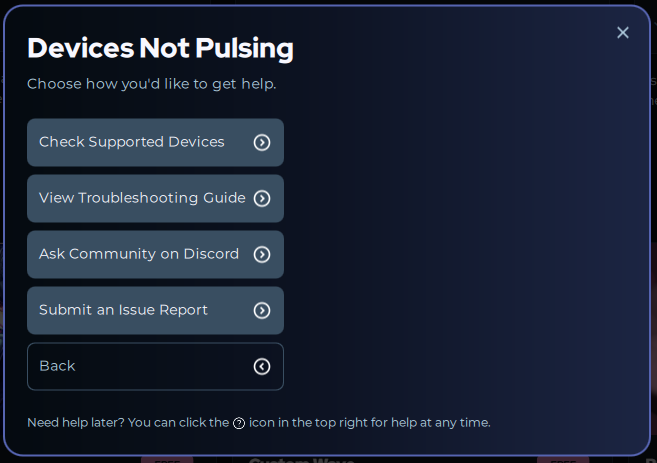
Check Device Not Detected if issues persist.
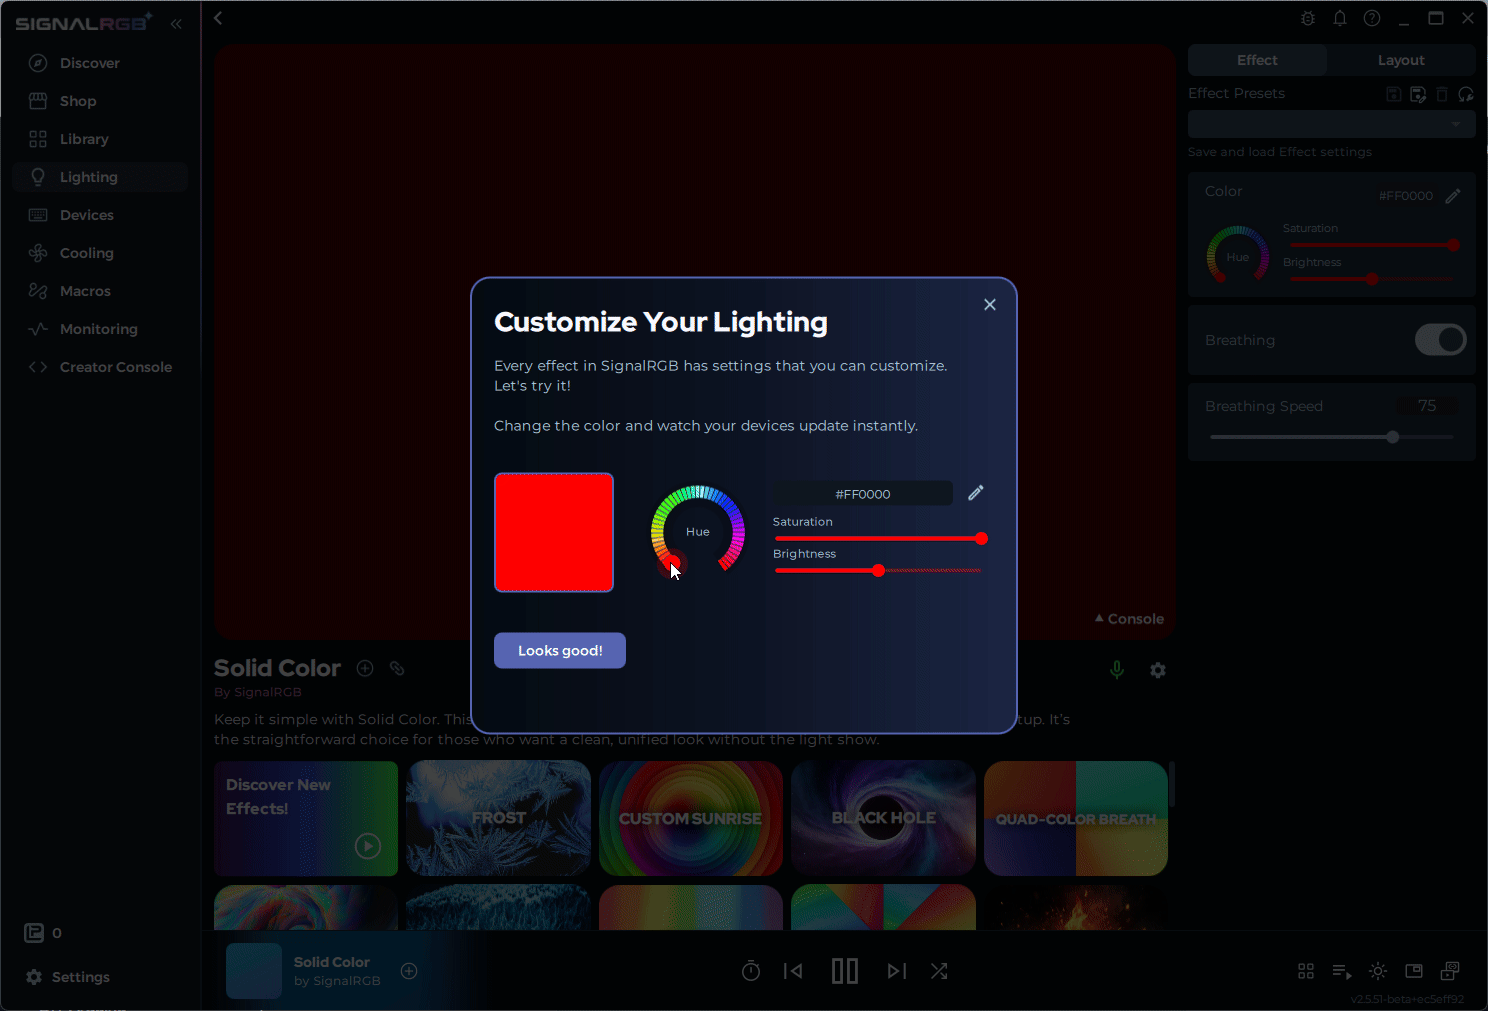
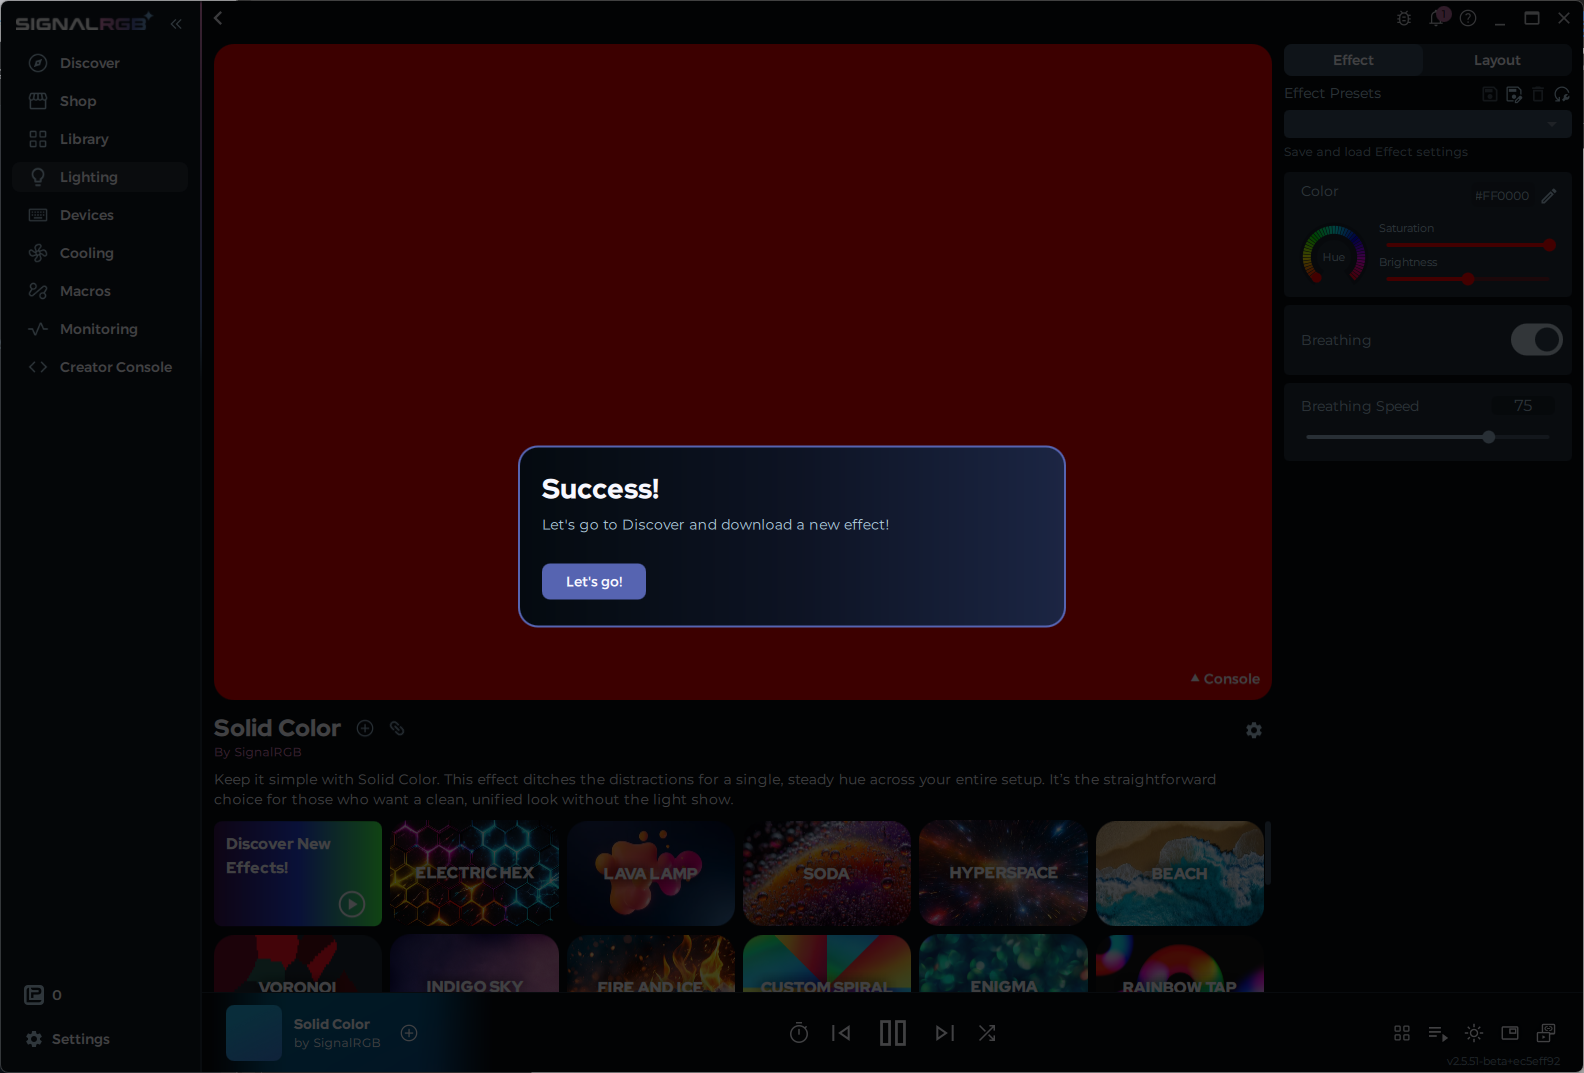
Customize Your Lighting
Section titled “Customize Your Lighting”Every effect in SignalRGB has settings that you can customize. You can change the color and watch your devices update instantly.
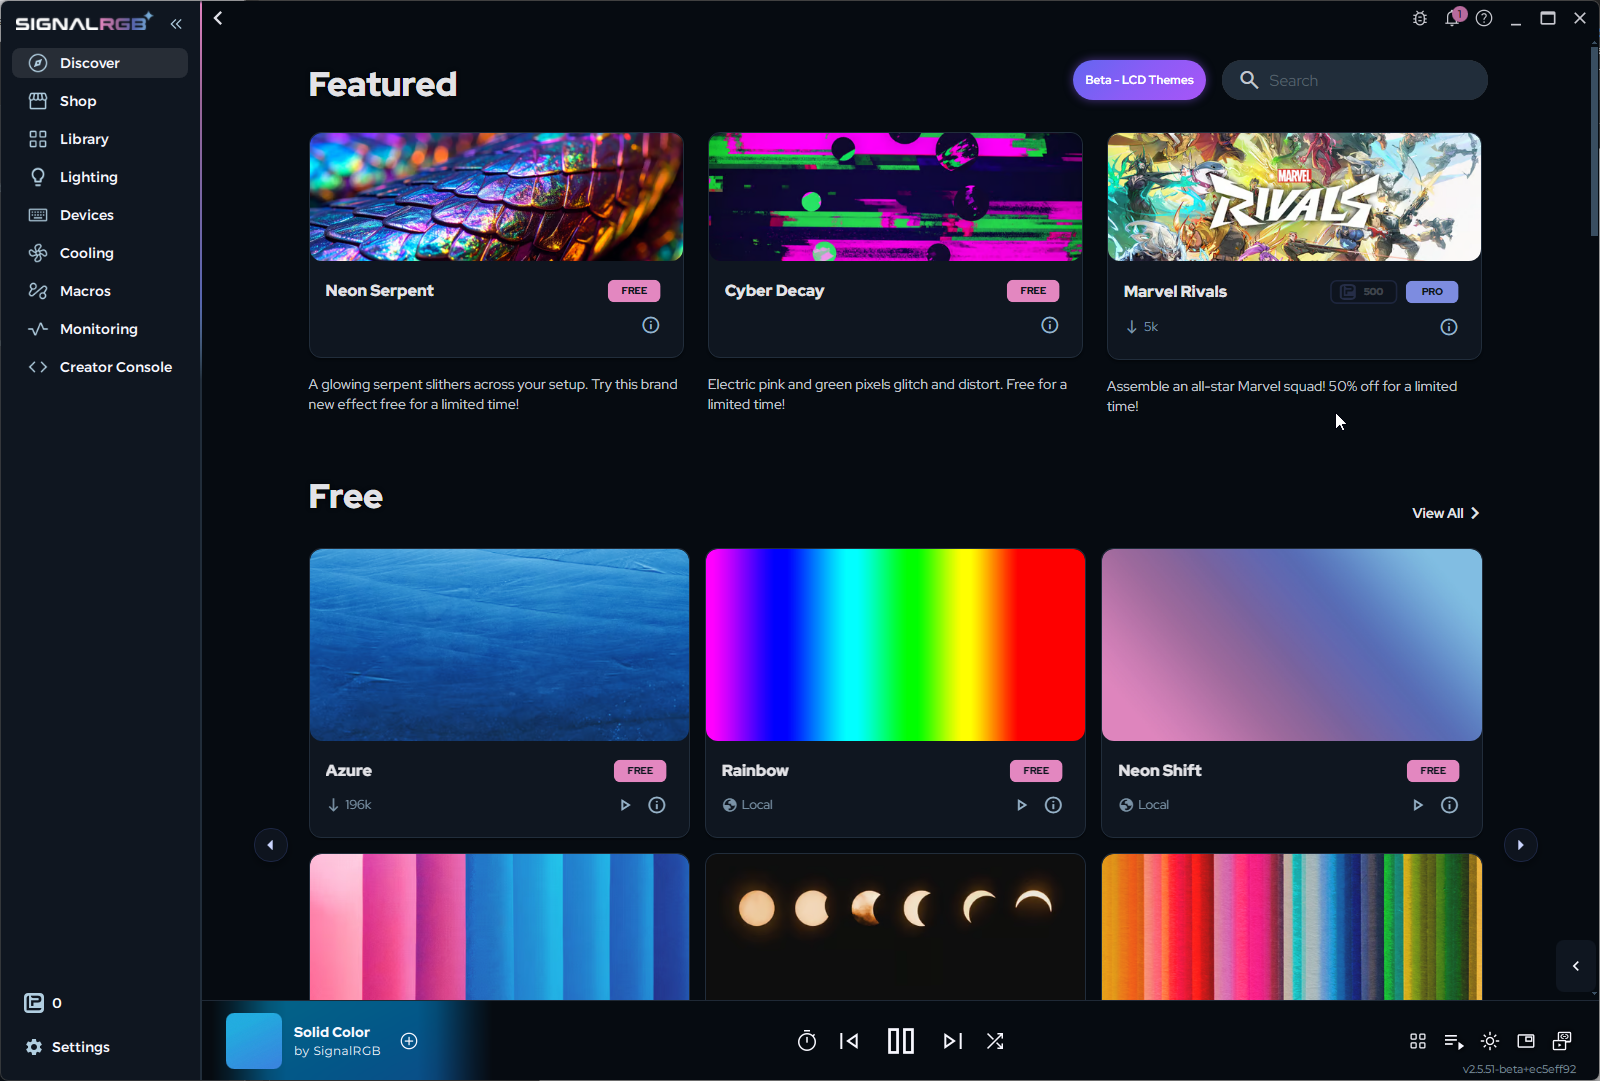
Head to the Discover Page
Section titled “Head to the Discover Page”Once you’ve customized your color, SignalRGB directs you to the Discover page to explore effects.
Click on an effect card to open the effect’s description page.
Download and Apply an Effect
Section titled “Download and Apply an Effect”Each effect has a description page where you can watch a video preview, read about what it does, download it, and share it with friends.
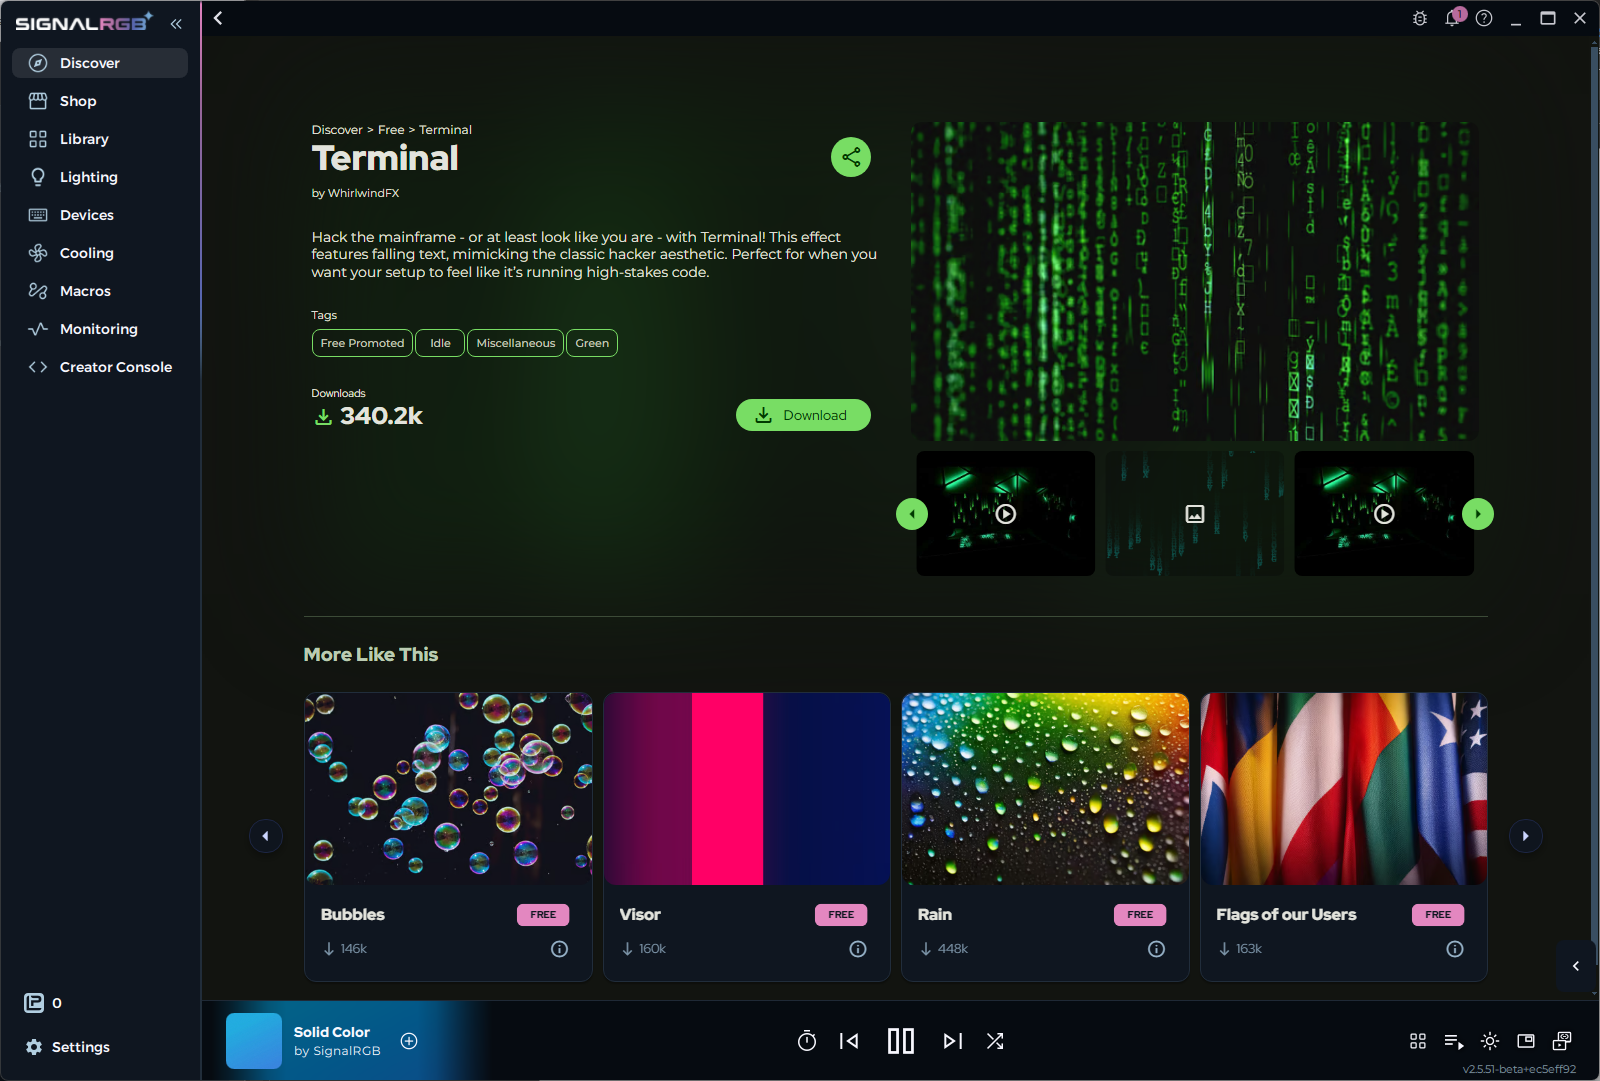
After the effect downloads, you’re taken to the Lighting page. The canvas displays your chosen effect, and customization controls appear to the right. A quick pick of installed effects sits below the canvas.

Browse the Library Page
Section titled “Browse the Library Page”Open the Library page to see all your installed effects.
- The top of the page lists your playlists and lets you create new ones
- Below the playlists, effects are sorted into Pro Effects and Free Effects
- Click any effect to apply it or view each effect description page
Explore the Devices Page
Section titled “Explore the Devices Page”Open the Devices page. SignalRGB does more than just RGB lighting — this is where you manage all your connected hardware.
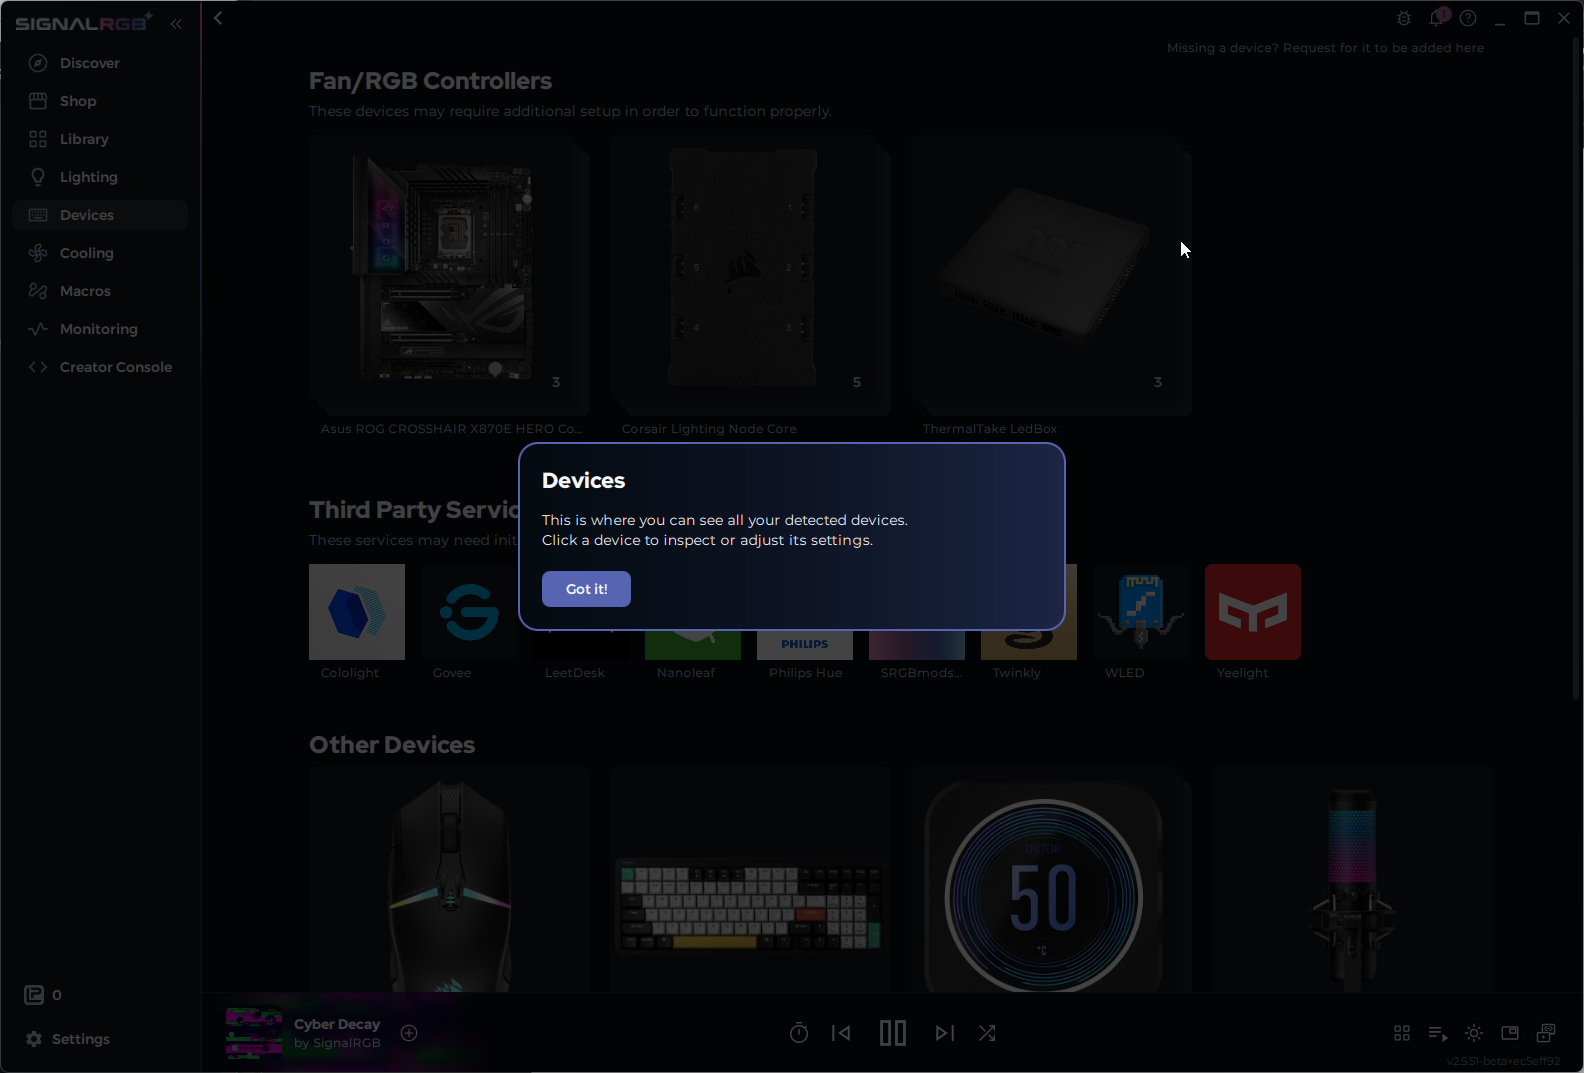
A prompt introduces the page and invites you to inspect your devices:
- Fan/RGB Controllers are components connected to your motherboard
- Third Party Services are devices that interface through a third-party service before syncing with SignalRGB
- Other Devices (keyboards, mice, GPUs, RAM, etc.) don’t need configuration and are already synced
Configure RGB Controllers or ARGB Headers
Section titled “Configure RGB Controllers or ARGB Headers”Some devices — such as RGB controllers and motherboard ARGB headers — need additional setup before SignalRGB can control them.
Devices that need attention appear at the top of the page. Click a device to open its configuration page, then follow the on-screen instructions. See Configure RGB Controllers for detailed steps.
Set Up Your Layout
Section titled “Set Up Your Layout”- After you have configured your motherboard headers and/or RGB controllers, return to the Lighting page through the left navigation menu
- Click the Layout tab above the effect customization tools in the top right corner of the page
- Drag and drop your devices to match their physical positions on your desk or inside your PC
- Save your layout
This lets lighting effects flow correctly across your entire setup. See About Layouts for more information.
Choose and Customize an Effect
Section titled “Choose and Customize an Effect”- Click the Effect tab to return to the effect view
- Pick an effect from the quick picks below the canvas
- Adjust settings with the controls to the right of the canvas
You should see your devices now displaying the selected effect with your customizations applied.
Tips & Best Practices
Section titled “Tips & Best Practices”- Uninstall all other RGB software before launching SignalRGB for the first time. Even background services from programs like iCUE or Synapse can block device detection.
- If a device isn’t showing up, check the Conflicting Programs list — the culprit is often a background service you forgot was running.
- Some RGB controllers and ARGB headers require manual configuration in the Devices page before effects will show. Don’t skip that step.
- Use the Layout tab to position devices to match your physical setup — this makes effects like screen ambience and audio reactive look much more natural.
Troubleshooting
Section titled “Troubleshooting”- Device not detected — see Device Not Detected
- Devices pulsing but wrong colors — check Conflicting Programs
- RGB controller not responding — see Configure RGB Controllers
For more help, see the Troubleshooting section.
Related Articles
Section titled “Related Articles”- Navigating SignalRGB
- How to Customize Effects
- Conflicting Programs
- Device Not Detected
- How to Update SignalRGB
Need more help? Contact Customer Support.