How to Install SignalRGB
Follow these steps to install SignalRGB on your computer.
Before You Begin
Section titled “Before You Begin”Make sure your system meets the minimum requirements before installing. See System Requirements for details.
1. Download the Installer
Section titled “1. Download the Installer”Go to the SignalRGB website and download the latest installer.

2. Run the Installer
Section titled “2. Run the Installer”Locate the downloaded file and double-click it to begin installation.
The installer may ask for administrator permissions. Click Yes to allow it to continue.
3. Follow the Setup Wizard
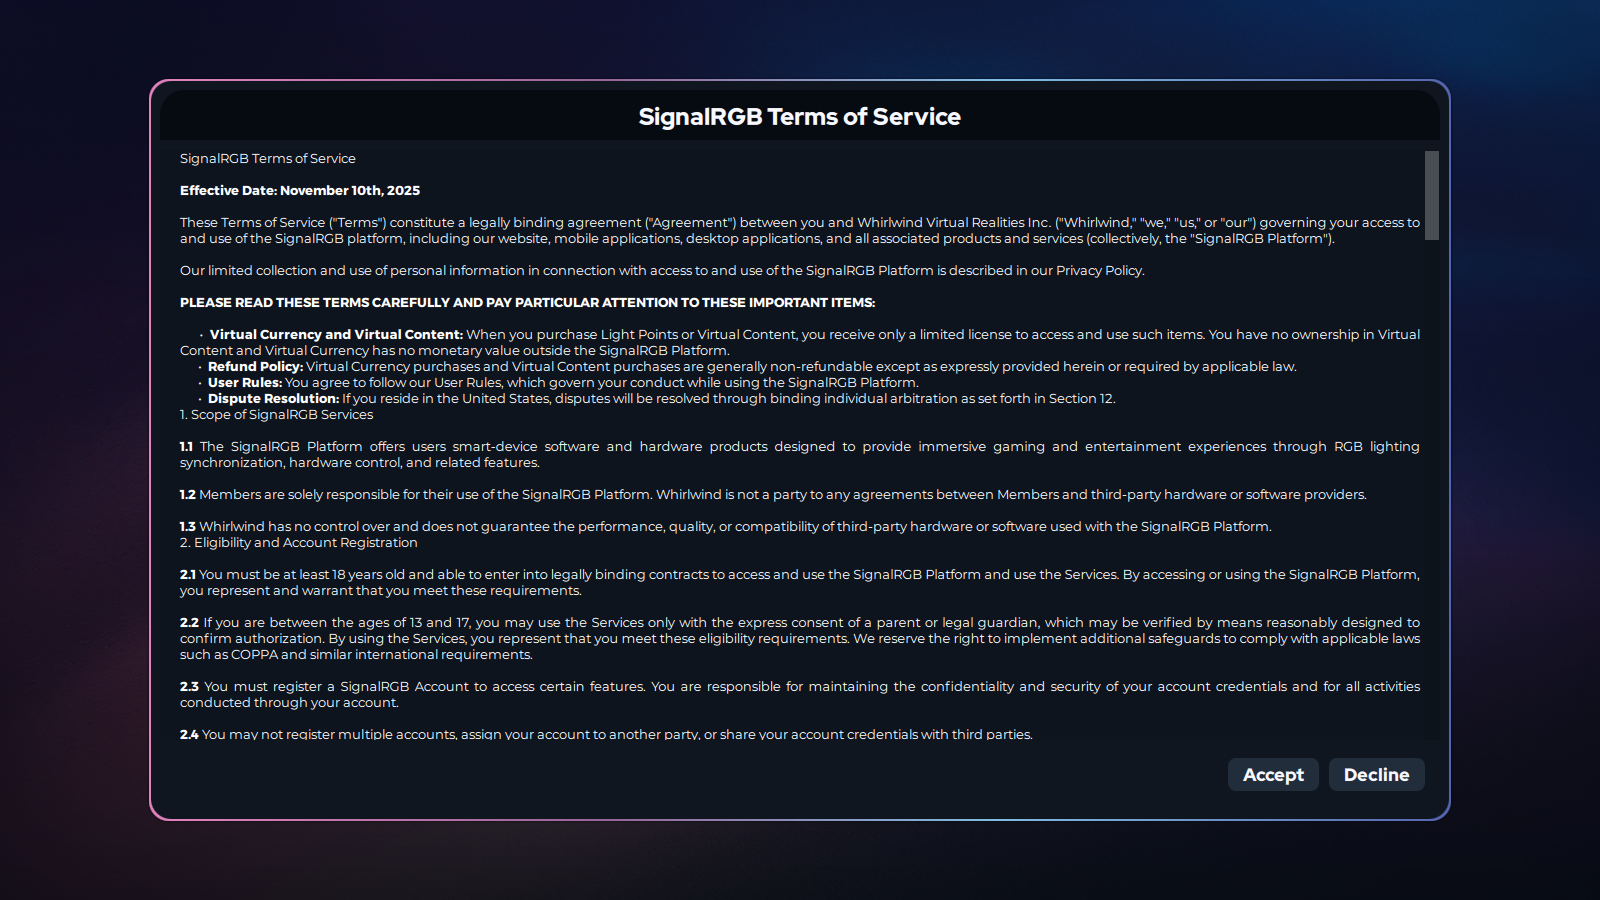
Section titled “3. Follow the Setup Wizard”The setup wizard guides you through the installation process. Accept the license agreement when prompted.
Choose your preferred installation location or leave it as the default. Click Next to advance through each screen.
4. Wait for Installation to Complete
Section titled “4. Wait for Installation to Complete”The installer copies the necessary files to your system. This typically takes less than a minute.
Do not close the installer window while it is running.
5. Launch SignalRGB
Section titled “5. Launch SignalRGB”SignalRGB launches automatically once installation finishes. You do not need to find and open it manually.
If it does not open automatically, locate SignalRGB in your Start menu and open it from there.
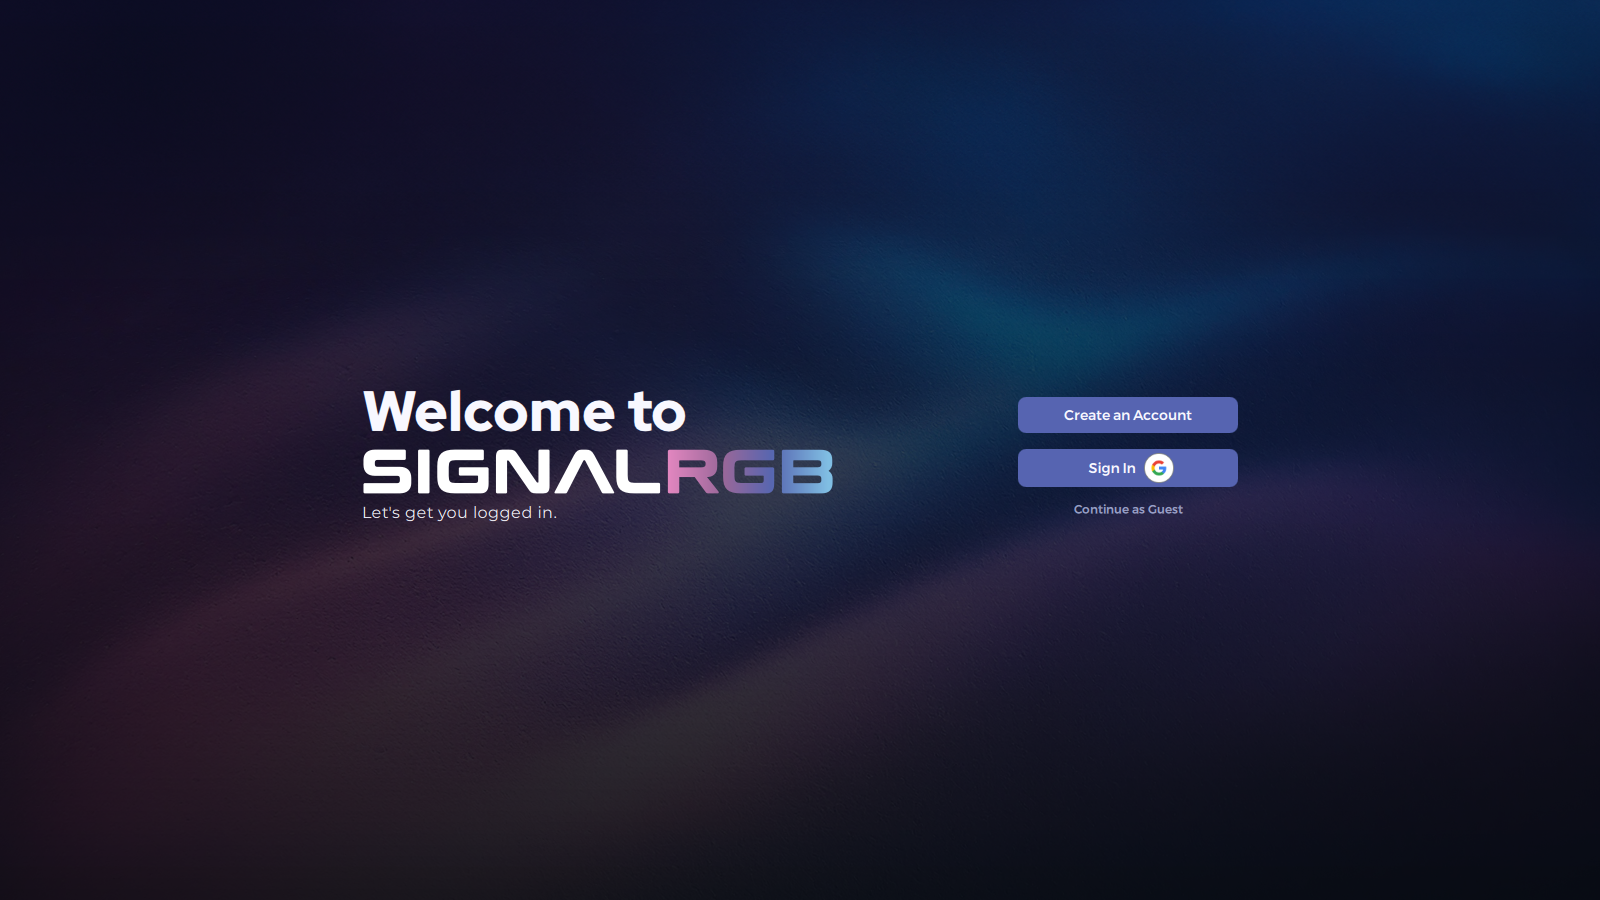
6. Create or Sign In to Your Account
Section titled “6. Create or Sign In to Your Account”You need a SignalRGB account to use the application. Follow the on-screen prompt to sign in or create a new account.
See How to Create an Account for a full walkthrough.
What’s Next
Section titled “What’s Next”Now that SignalRGB is installed, follow the First-Time Setup guide to configure your devices and get your lighting running.