Forewarning
The process of saving USB data is easy, but the drivers for these programs are known to conflict with some systems and cause loss of USB port function until the program is uninstalled. If you lose function of your USB ports, disable ‘Secure Boot’ in BIOS/UEFI. Having a system restore on a flash drive or being able to remotely access your computer in a way that doesn’t require interaction from the client PC on boot is recommended before you start so in the event that disabling Secure Boot doesn’t fix the issue you can uninstall the program without requiring a reinstallation of windows. You are doing this at your own risk, if you don’t feel comfortable trying, request your device here.
It is highly recommended to not use a laptop system for this process as not all allow you to disable secure boot in BIOS.
Prerequisites
- A USB capture program installed, i.e. Wireshark.
- The RGB software of the device your capturing data for is installed and fully updated.
- Note: If using Wireshark you must install the optional USBPcap driver during installation.
Getting Good Data
During this process make sure to only have only ONE RGB software that is controlling the device, having SignalRGB AND the company's software talking to the device or SDKs like wallpaper engine, ASUS Sync etc. running will make the data captured significantly harder or impossible to decode. The less noise generated during this process the better. If recording a mouse, Try to use a second mouse to control the computer if possible as mouse movement can send over a thousand packets a second that need to be filtered out.
- Note: For best results you’ll likely need a few captures to get all the various packets needed for a fully functioning device.
The data you're trying to record is:
- The Device’s Startup / Initialization (If applicable).
- Changing modes (going into Static/Custom mode).
- Changing the colors
- DPI / Other Features (If applicable)
- The Device going back to hardware mode again (if applicable).
Device Startup / Initialization Starting capture before you open the RGB software (make sure it’s fully closed first) will give the startup data when you open programs like ICUE, Synapse. These are the packets that bring the device out of hardware mode and open it up to software color control. Without these packets working any color changes sent to the device will be ignored.
Changing the colors For color changes use a static color (no modes, profiles, or animated effects). Ideally, get a capture going between solid colors, (Red: #FF0000, Green: #00FF00, and Blue: #0000FF in order) and ones using a mix of colors (#102030 (R: 16, G: 32: B 48) is a good example of the R/G/B channels being different easily identifiable values in HEX as they show up as ‘10 20 30’) Try to do both full device color changes and changing individual zones/LED’s to different colors.
- It’s best to break these captures down into smaller sections and try to isolate individual settings or commands.
- For AIO’s make captures with just the pump RGB on, with Pump and connected fan RGB, and then just the fan RGB alone if possible. These devices will normally treat the Pump and fans as separate channels.
- For Keyboards changing random groups of 5-20 keys is ideal to find the best packets to use. If your device has nonstandard keys make sure to include them in their own capture (G/Macro keys, Media keys, Extra Buttons in general). Some keyboard brands (namely Logitech, Corsair, Steel Series, and HyperX) have numbers to identify each key. For these brands you’ll need to do a capture going from top left to bottom right in rows changing each key to any color starting with a consistent background color. This will give us both all of the key Id’s and the order they go in.
- If capturing for a product that is dynamic like Corsair lighting controllers, NZXT hue devices etc. Please include what you have configured with them and the channels they’re on. (i.e., Channel 1 has 2 LL fans, Channel 2 has 3 QL fans) and the LED counts if possible. Each channel’s data is normally spread over multiple packets and the Led count is used to determine the order.
Process
Below is a the short form process on how to capture USB data. As we progress through the tutorials we'll revisit this idea and get into how to isolate certain commands and what they mean.
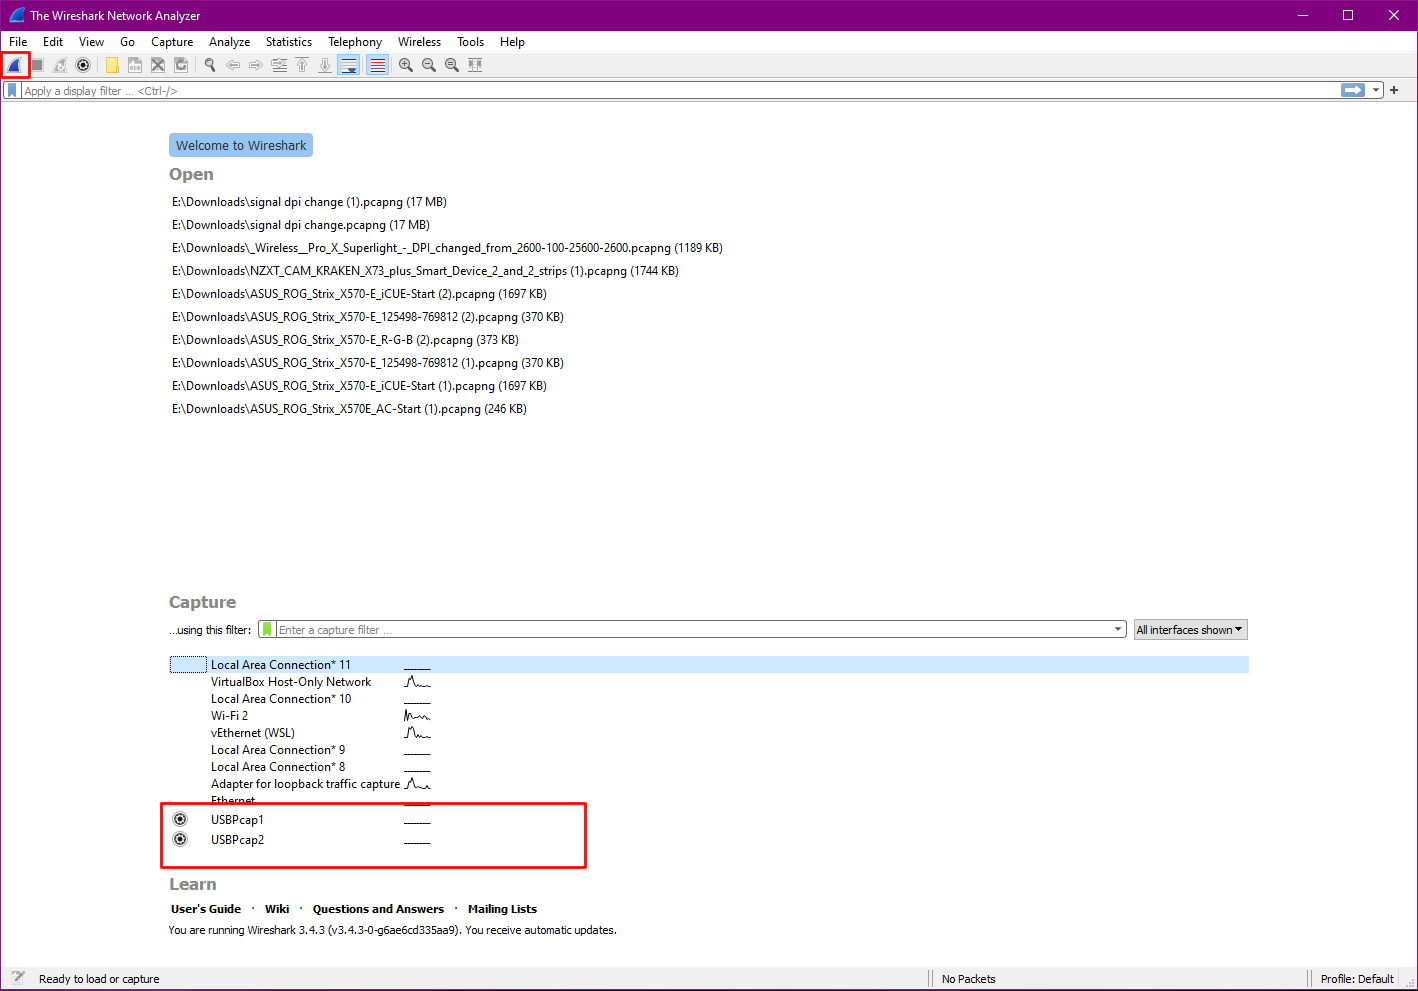
After installation reboot your computer, at the bottom click on USBPcap1, then shift click down to the last one. Click the shark fin top left to start capture.
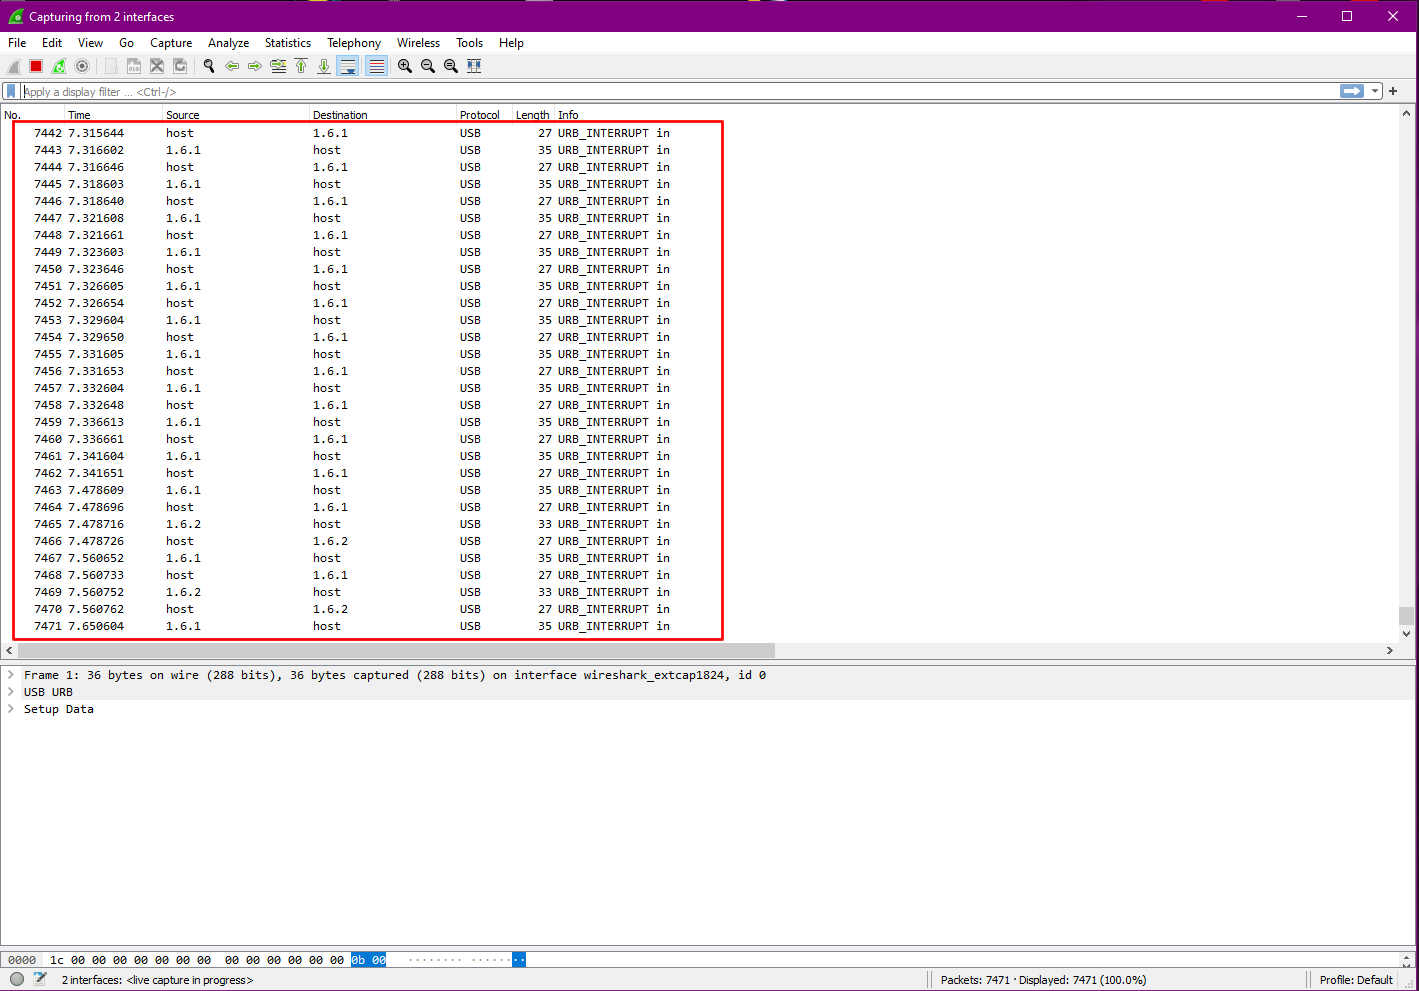
You should then see it start collecting packets. These are every bit of data being send over USB by your system.
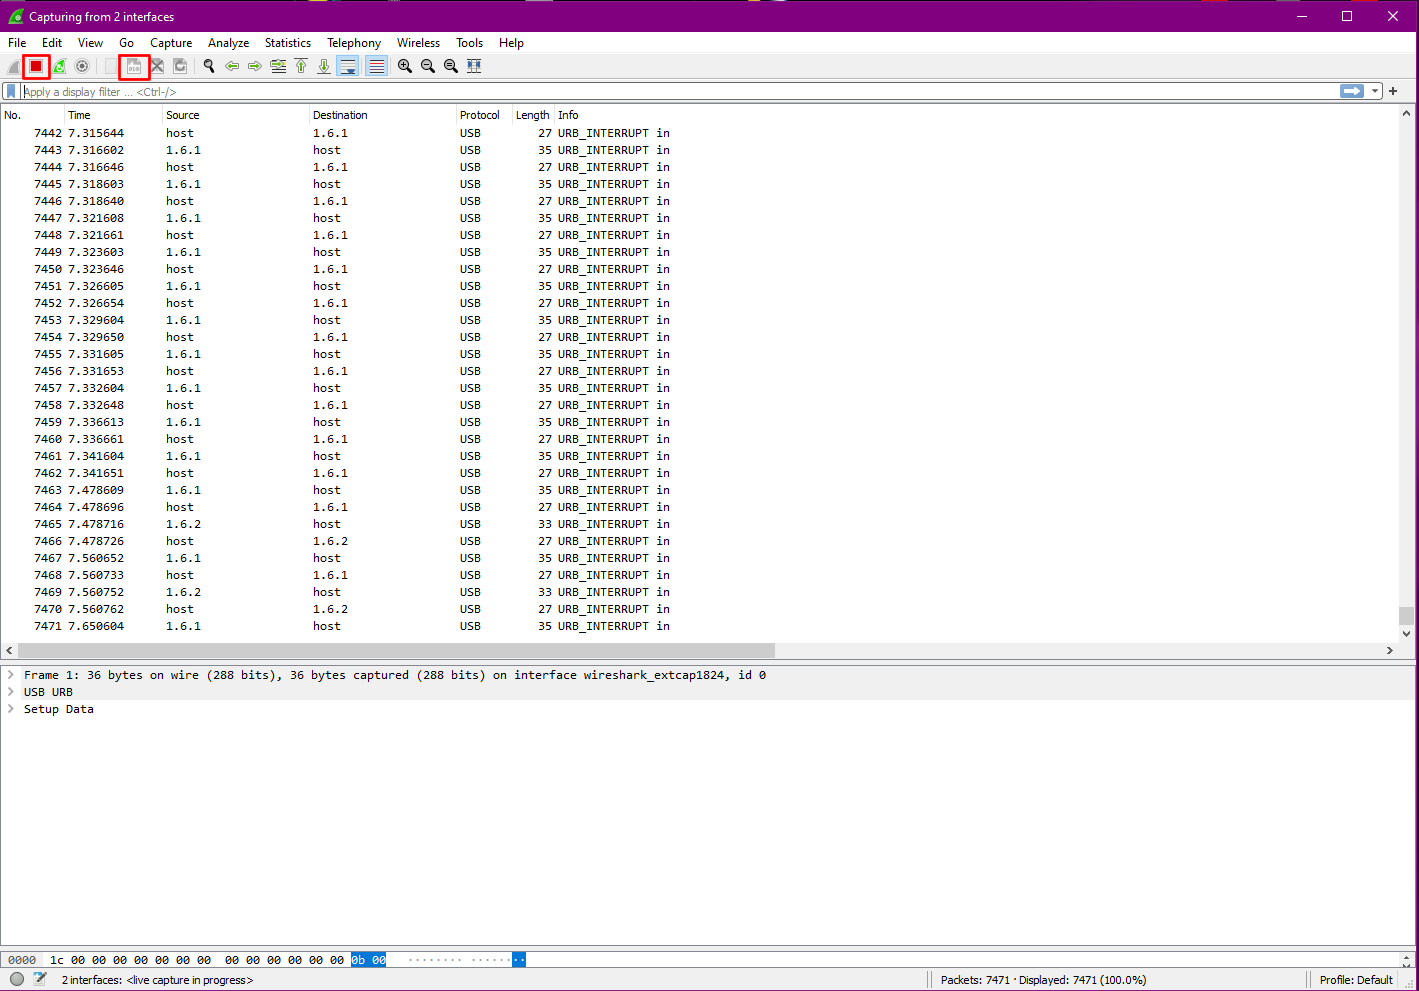
To stop and save the capture hit the Stop Button in the Top left, and then the save button to save it to a file to look over later.
That's all there is to just capturing USB Data! The real question is what do to with it after you capture it, and how to make it readable to us instead of being gibberish numbers.